Dealing with hazardous DIY waste after renovations in Homerton
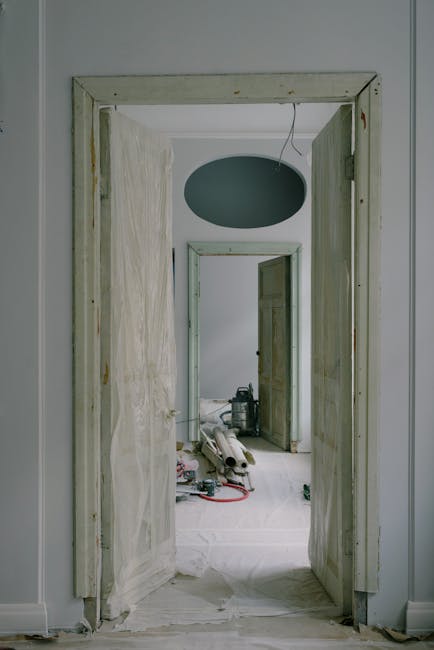
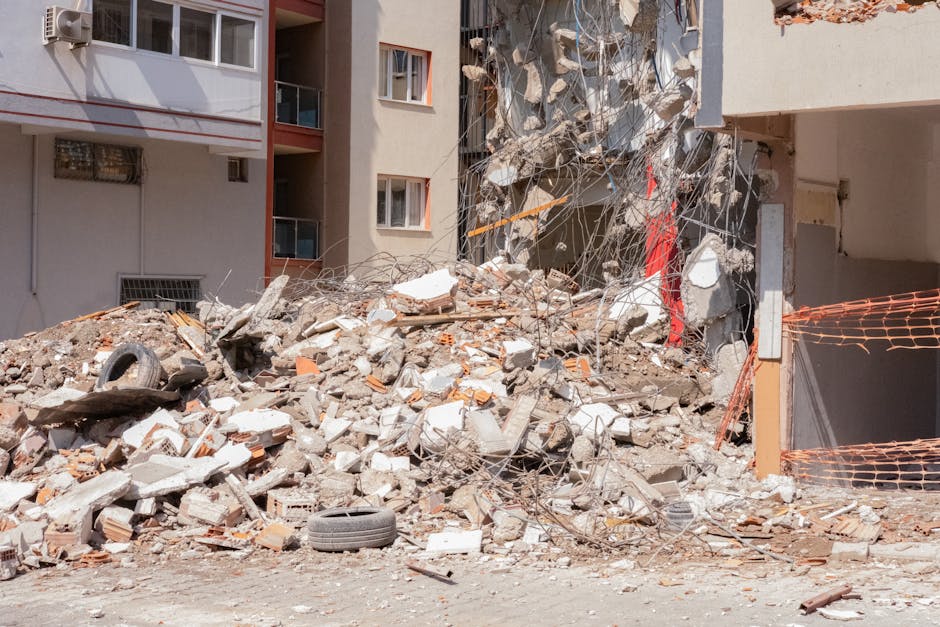
Renovations have a way of creating two kinds of mess: the obvious piles of offcuts, plaster and packaging, and the less obvious stuff that can cause real trouble if you leave it sitting around. When people think about dealing with hazardous DIY waste after renovations in Homerton, they usually picture a single paint tin or a dusty old sealant tube. In reality, it can include solvents, treated timber, adhesives, aerosols, leftover plasterboard dust, old insulation, sharp rubble, and awkward containers that still hold residue.
If you have just finished a kitchen refit, a bathroom update, or a weekend room refresh, the last thing you need is a confusing pile of materials at the end of a hallway. The good news is that once you know what counts as hazardous, what needs separate handling, and what can be cleared with ordinary renovation waste, the whole process becomes much simpler. This guide breaks it down in plain English, with a focus on safe, sensible decisions for Homerton homes and flats.
There is a right way to do this, and it does not have to be stressful. Let's get into it.
Table of Contents
- Why hazardous DIY waste matters after renovations
- How the clearance process works
- Key benefits and practical advantages
- Who needs this and when it makes sense
- Step-by-step guidance
- Expert tips for better results
- Common mistakes to avoid
- Tools, resources and recommendations
- Law, compliance, standards and best practice
- Options, methods and comparison table
- Case study or real-world example
- Practical checklist
- Conclusion
- Frequently asked questions
Why Dealing with hazardous DIY waste after renovations in Homerton Matters
Hazardous DIY waste is not just a sorting issue. It can create health risks, storage problems, odours, and accidental contamination if it is mixed with ordinary rubble or left in a warm room for too long. A half-full tin of paint in the wrong place may seem harmless, but a leaking solvent container or broken fluorescent fitting is a different story altogether.
In a dense neighbourhood like Homerton, these issues matter even more because space is tight. Flats, maisonettes, converted buildings and narrow access routes make it harder to stash waste safely "for now". And let's face it, the "for now" pile becomes a permanent feature very quickly.
There is also a practical side. Mixed waste is harder to remove, more awkward to carry, and more likely to lead to delays. If you want your renovation to end cleanly, you need a system that separates hazardous materials from general builders' waste before they become a nuisance. For larger clear-outs, many people choose a broader service such as builders' waste clearance or, for full property jobs, home clearance so the sorting doesn't turn into a weekend lost to bin bags and guesswork.
Expert summary: treat hazardous DIY waste as a separate category from general renovation debris, identify it early, keep it contained, and arrange removal with a method that matches the material rather than forcing everything into one skip-sized solution.
How Dealing with hazardous DIY waste after renovations in Homerton Works
The process is simpler when you think in stages. First, identify the items that need special handling. Then store them safely. Then decide whether you can take them to the right disposal route yourself or whether a professional collection is the calmer option.
1) Identify what is actually hazardous
Not every messy renovation item is hazardous. Dusty plasterboard is annoying, yes, but not necessarily hazardous in the same way as solvent-based paint or chemical stripper. The challenge is that DIY waste often mixes categories. A bag of offcuts might contain nails, treated timber, broken tiles and a tin of residue at the bottom. That is where confusion starts.
2) Separate by type, not by convenience
Grouping waste by "what fits together" is usually a mistake. Separate liquid-based products, pressurised containers, sharp fragments, and anything with chemical residue. Keep batteries, electrical items, light fittings, and bulbs apart from timber and rubble. If you've cleared a loft or garage during the renovation, it can help to use the same organised approach you would use for a loft clearance or garage clearance.
3) Contain and label
Use sturdy boxes, sealed tubs, or lidded containers where appropriate. Keep lids on tins. Don't decant chemicals into drink bottles - that one really should go without saying, but people do it. If an item leaks, double-bag it carefully and keep it away from children, pets, heaters and direct sunlight.
4) Choose the correct removal route
Some materials can be taken separately as part of an organised waste collection. Others may need specialist handling. For general renovation debris, a waste route such as waste removal can be the practical fit. For anything with a clear hazardous element, the important point is not speed; it is correct handling.
5) Clear the site properly
Once the hazardous items are removed, the rest of the renovation waste becomes much easier to deal with. Suddenly the room feels usable again, and that dusty, slightly chemical smell starts to fade. A small thing, but a relief.
Key Benefits and Practical Advantages
Doing this properly has benefits beyond avoiding a mess in the corner of the room. The advantages are practical, financial, and frankly a bit emotional too - because a renovation is supposed to improve your space, not leave you staring at warning labels for days.
- Lower risk of accidents: fewer leaks, spills, broken containers, and sharp edges left in walkways.
- Cleaner renovation finish: once hazardous waste is gone, the rest of the clean-up becomes far more manageable.
- Better use of space: especially useful in Homerton flats where every metre counts.
- Less sorting confusion: separating waste early prevents that "what on earth is this?" moment later on.
- More efficient disposal: organised waste is easier to move, load and remove.
- Better recycling potential: when non-hazardous materials are kept clean and separate, more of them can be handled appropriately.
There is also the quiet benefit of peace of mind. Once the dangerous bits are dealt with, you can get on with repainting, styling, or just enjoying the room. Truth be told, that's often what people want most.
Who This Is For and When It Makes Sense
This topic is relevant to more people than you might think. You do not need to be managing a major gut renovation to run into hazardous DIY waste. A modest weekend project can create the same headaches if the wrong materials end up mixed together.
- Homeowners finishing bathroom, kitchen, or hallway work.
- Landlords clearing renovation waste between tenancies.
- Flat owners dealing with limited storage and shared access.
- DIY enthusiasts who have accumulated leftover materials over several projects.
- Tradespeople or contractors needing a tidy exit after a small domestic job.
It makes sense whenever the waste is awkward, potentially risky, or too mixed to be handled as ordinary rubbish. That is especially true if you have leftover paint, chemical products, old insulation, sharp fixings, or contaminated packaging. If the waste has been sitting in a cold hallway since Tuesday and it now looks like it has opinions of its own, you probably waited too long.
Step-by-Step Guidance
Here is the most workable approach for a typical renovation in Homerton. Not glamorous, but effective.
- Stop and assess the pile. Before moving anything, look through what you have. Separate obvious hazard items first.
- Pull out liquids and residues. Paint, thinners, adhesives, sealants, solvent containers and aerosol cans usually need separate treatment.
- Set aside sharp or broken items. Broken glass, metal offcuts, blades and damaged fittings should be boxed or wrapped securely.
- Keep electrical and battery items apart. Old fixtures, cables, tools and battery packs should not be thrown in with rubble.
- Check packaging and labels where possible. Even a quick look can help you decide whether something is ordinary waste or needs special handling.
- Store everything safely. Use a dry, ventilated place away from heat and foot traffic.
- Arrange the right collection. Match the removal method to the waste type, rather than assuming one truck solves everything.
- Clean the area after uplift. A quick sweep of dust and fragments stops the job from feeling half-done.
If you are also dealing with furniture, old cabinets or bulky renovation remnants, it can help to bundle the project into one wider clearance. Services like furniture disposal and furniture clearance are useful when renovation waste includes broken units, doors or damaged shelving that no longer has a place in the home.
Expert Tips for Better Results
Most problems come from rushing or mixing categories. The trick is not to be perfect; it is to be methodical enough that the awkward stuff doesn't trip you up later.
Keep hazardous items visible, not hidden
People sometimes tuck a small chemical container into a larger bag "so it's out of the way". Bad idea. Keep hazard items easy to identify. If someone else is helping, they should be able to see at a glance what requires care.
Use the original container where possible
Original packaging usually gives the clearest clue about what the product is and how it should be handled. If the label is still legible, great. If not, do not invent your own system with random marker pen and hope for the best.
Leave some breathing room
Overpacked boxes tear, tip and leak. A half-full secure box is far better than a bulging bag that collapses in the lift or on the stairs. That small bit of restraint saves a lot of annoyance.
Plan for access
Homerton properties can be straightforward or slightly fiddly, depending on the building. Narrow stairs, communal entrances, timed access, and parking all affect collection. If you already know access is awkward, make the setup easier before the team arrives. Put the waste where it can be reached cleanly, not blocked behind a wardrobe and three paint trays.
Think about the whole property, not just the job in front of you
If renovation waste is only one part of a much larger clear-out, you may save time by handling everything in one go. That can include stored items in the loft, clutter in the garage, or bulky household items that need moving alongside the renovation debris. It's often cleaner to combine the job with house clearance or flat clearance where appropriate.
Common Mistakes to Avoid
There are a few recurring mistakes that make hazardous DIY waste harder to deal with than it needs to be. Most are easy to avoid once you know them.
- Mixing everything together: one bag of "renovation stuff" can become impossible to sort safely.
- Leaving liquids uncapped: a loose lid can become a smell problem fast.
- Storing waste near heat: radiators, sunny windows and boiler cupboards are poor choices.
- Ignoring broken sharp items: nails, glass and blades are small, but they bite.
- Forgetting about dust and residue: a container may look empty but still hold enough residue to matter.
- Assuming one solution fits all: not every waste type belongs in the same removal method.
- Waiting until the end to sort it: by then the pile is bigger, messier and more annoying.
A small aside: the number of times people say, "It's only a couple of tins," right before pointing at a whole shelf of half-used products is, well, let's just say it's not small. It happens.
Tools, Resources and Recommendations
You do not need specialist industrial equipment to organise most domestic renovation waste. A few basic items go a long way.
- Sturdy boxes or tubs: useful for small hazardous items, bulbs, fittings and sharp pieces.
- Heavy-duty bags: best for cleaner, dry non-liquid debris, but not for sharp or leak-prone waste unless double-contained.
- Labels or marker pens: simple, but helpful for identifying containers.
- Work gloves: especially helpful when sorting rubble, timber or broken fittings.
- Dust mask: sensible when dealing with powdery renovation residues.
- Protective eyewear: useful if you're handling broken materials or dusty debris.
- Reusable trays or tubs: handy for carrying smaller items without spilling them all over the hallway.
If the project has created mixed waste with a lot of bulky material, a proper collection service is often easier than trying to handle it piece by piece. That is where a targeted service such as builders' waste clearance fits neatly into the picture. For businesses or landlords dealing with repeated jobs, business waste removal may also be relevant, though domestic renovation waste should still be separated carefully.
One more recommendation: check the company's policies around health and safety, insurance and safety, and recycling and sustainability. Those pages can help you understand how the operation is run and what standards matter behind the scenes.
Law, Compliance, Standards and Best Practice
With hazardous waste, it is wise to stay cautious and avoid overclaiming. UK rules and local expectations can differ depending on the material, the volume, and how it is stored or moved. The safe approach is simple: do not guess if an item is hazardous, and do not mix suspect materials with ordinary waste.
In practice, good compliance usually means:
- keeping hazardous items separate from general DIY waste
- storing them securely until collection or approved disposal
- not burning, pouring away, or dumping leftover chemicals
- using appropriate containers for sharp or leak-prone items
- making sure whoever handles the waste knows what they are collecting
For many domestic renovation projects, best practice is less about legal fine print and more about common sense, careful segregation, and using a reputable collection route. If you are unsure whether a product, residue, or object is hazardous, treat it cautiously until you have clarity. That is the honest answer.
When choosing a provider, it also makes sense to check straightforward trust details such as about us, payment and security, terms and conditions, and complaints procedure. They do not remove waste for you, of course, but they do tell you a lot about how the service is run.
Options, Methods and Comparison Table
Different waste situations call for different solutions. Here is a simple comparison that may help you decide what fits your renovation clean-up.
| Method | Best for | Strengths | Limitations |
|---|---|---|---|
| Self-sorting and storage | Small amounts of clearly separated items | Low immediate cost, good control, flexible timing | Needs space, time, and careful handling |
| General waste collection | Non-hazardous renovation debris | Efficient for mixed but safe materials | Not suitable for all hazardous items |
| Specialist or organised clearance | Mixed renovation waste, bulky debris, awkward access | Less stress, more suitable for bigger jobs, faster site recovery | Usually costs more than doing nothing, which is fair enough |
| Full-property clearance support | Renovations combined with decluttering | One coordinated visit, cleaner final result | May be more than you need for a tiny project |
For a small flat repaint, self-sorting may be enough. For a kitchen strip-out with broken units, dusty packaging, old fittings and a few suspect tins in the back of a cupboard, a more organised clearance tends to be the calmer route. If you are also clearing a loft or garage, that changes the picture again.
Case Study or Real-World Example
A fairly typical Homerton scenario goes like this. A couple finishes renovating a compact two-bedroom flat. The work itself is manageable, but the after-effects are not. There are paint tins in a utility cupboard, a tube of adhesive with residue, broken tile offcuts, some old sockets, dust-covered packaging, and a damaged shelving unit they forgot about until the very end. The hallway starts to feel narrow, then narrower still.
At first, they try to "keep it together" in one corner. By the next morning, the smell of paint and adhesive has made the room feel unfinished. They separate the liquids, box the sharp pieces, and move the non-hazardous bulky bits into a clearer pile. Once the waste is divided properly, the removal itself becomes much smoother. What felt like a mountain becomes a few distinct tasks.
The important lesson is not that the job was huge. It was that the waste was mixed. That is usually the real problem. Once the hazard items were treated separately, the rest of the flat could breathe again. Small victory, but a real one.
Practical Checklist
Use this quick checklist before you arrange removal or move anything further.
- Have I separated paint, solvents, adhesives, aerosols and other residue-based products?
- Are all lids secure and containers upright?
- Have I kept sharp items, broken glass and metal edges boxed or wrapped?
- Are batteries, cables, fittings and electrical items stored separately?
- Is the waste away from heat, children, pets and shared access routes?
- Have I kept non-hazardous rubble and timber apart where possible?
- Do I know which items need special handling and which do not?
- Is there enough space for safe collection without blocking exits?
- Have I checked the provider's safety and recycling information?
- Once the waste goes, will the area still need a final sweep or wipe-down?
If the answer to most of these is yes, you are in good shape. If not, pause and sort before the pile grows another layer. That little pause usually pays off.
Get a free quote today and see how much you can save.
Conclusion
Dealing with hazardous DIY waste after renovations in Homerton is really about clarity. Know what you have, separate it properly, keep it secure, and choose a removal method that suits the material rather than forcing everything into one messy solution. That approach protects your home, reduces stress, and helps the rest of the renovation finish the way it should: cleanly.
Whether you are handling a small bathroom refresh or a bigger property project, the safest path is the one that keeps hazardous items under control from the start. A little organisation now saves a lot of mess later. And when the last bag is gone and the room finally feels like yours again, that's a good feeling - the proper kind.
If you are planning your next step, focus on sorting first, then removal, then the final tidy-up. Simple, yes, but it works.
Frequently Asked Questions
What counts as hazardous DIY waste after a renovation?
Hazardous DIY waste usually includes leftover paint, solvents, adhesives, aerosols, chemical strippers, contaminated containers, certain electrical items, batteries, and anything that can leak, react, or cause harm if handled badly.
Can I put old paint tins in with normal renovation rubbish?
Usually not if they still contain liquid, residue, or pressure. Even "nearly empty" tins can be awkward, so it is safer to keep them separate and check the right disposal route.
Is plasterboard hazardous waste?
Not always. Plasterboard is often treated as a separate waste stream rather than ordinary rubbish, especially when it is in larger amounts. If it is contaminated with chemical residue or mixed with other problem materials, handle it more carefully.
What should I do with leftover adhesive or sealant?
Keep the container sealed if possible and store it upright in a safe place. Do not pour it away or mix it with other waste. Small remnants are still worth treating cautiously.
Do I need special disposal for batteries and old light fittings?
Yes, they should be separated from general rubble and packaging. Batteries and certain fittings can present handling risks, so keeping them apart is the sensible move.
How do I store hazardous DIY waste safely at home?
Use sealed containers, keep items upright, place them away from heat and sunlight, and make sure the storage area is not a high-traffic spot. A dry, stable, out-of-the-way location is usually best.
Can I combine hazardous DIY waste with bulky furniture or household items?
You can combine the overall project planning, but the items themselves should stay separated by type. For example, renovation debris can be handled alongside furniture disposal or furniture clearance, but not mixed into the same bag as chemical waste.
When is professional waste removal worth it?
It is often worth it when the waste is mixed, bulky, awkward to carry, time-sensitive, or potentially hazardous. If access is tight or you simply do not want the hassle, organised collection is usually the calmer choice.
What if I am not sure whether an item is hazardous?
Do not guess. Set it aside, keep it contained, and treat it cautiously until you are certain. Uncertainty is usually a sign to slow down rather than speed up.
How can I reduce DIY waste on my next project?
Buy a little more carefully, measure before ordering, keep products sealed, and plan your waste flow before the renovation starts. A bit of pre-planning avoids a lot of surplus at the end.
Is Homerton different from other areas when it comes to DIY waste?
The waste principles are the same, but local living conditions matter. In Homerton, many people work with flats, shared access, and less storage space, so neat sorting and timely removal become especially useful.
Where should I go next if I want help with a larger clear-out?
If the renovation has created a much bigger property-wide mess, it may help to look at related services such as house clearance, flat clearance, or broader waste removal support depending on the type of waste you need handled.